Dual Monitor Rig For Stereoscopic Viewing
2018 update
scroll down to read the original article including explanation of the principle
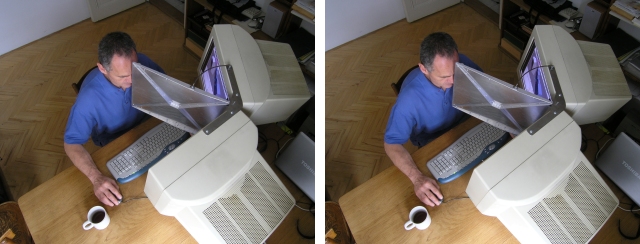
Two ordinary computer monitors arranged in a simple mirror stereoscope are still an excellent method of viewing stereoscopic content, in my opinion. Despite any development of dedicated 3D displays the advantages remain unchanged: Full resolution (no stripes), full colours, no ghosting, no flicker, comfortable viewing (no need to wear glasses) and unlimited selection of available monitors. Of course, only one person at a time can use the set-up - I use it primarily for adjusting and processing images, not for showing them to others.
Some time ago I replaced the obsolete CRT monitors with a pair of LCDs. Unlike the original solution, which included modification of the monitors themselves, the new arrangement is based on a stand suitable for any modern displays with the standard VESA mounting interface (four screws at the back). Even adjusting the stand to monitors of markedly different size (within limits) would only be a matter of drilling several new holes in the wood. Despite the short life of electronics, the stand can now hopefully be used as long as such a thing as a computer monitor is around...
I use StereoPhoto Maker for image alignment and Geeqie (Linux) as a viewer. Both feature a specific viewing method for mirror stereoscopes - they are able to flip either of the images on the fly.
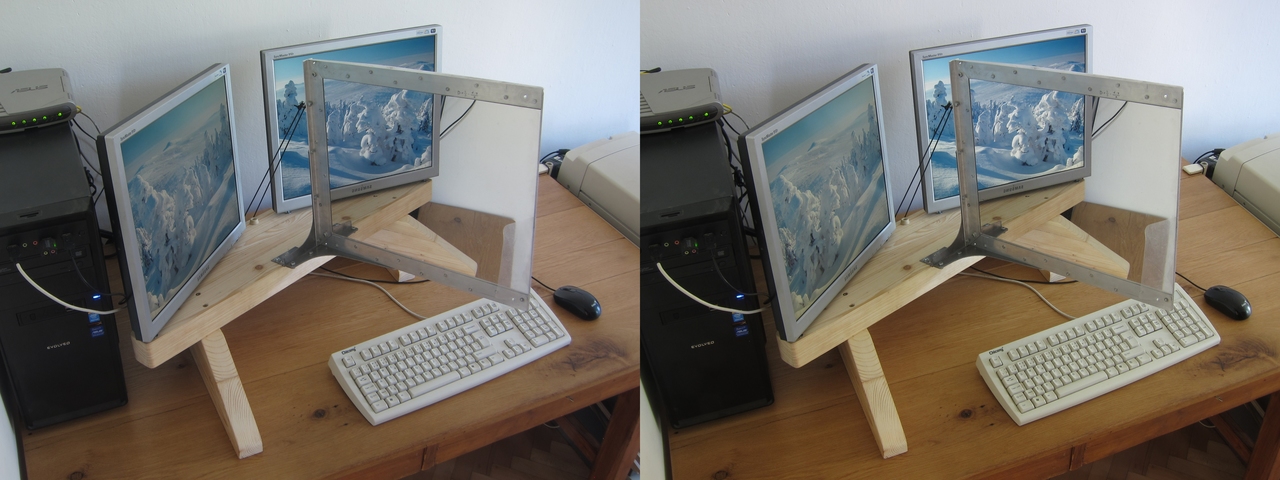
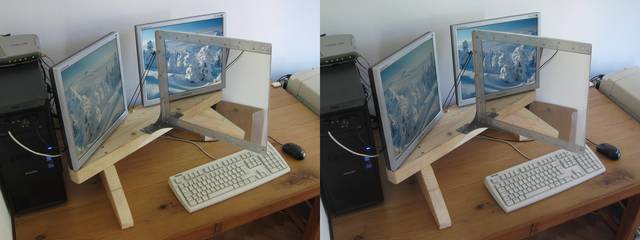
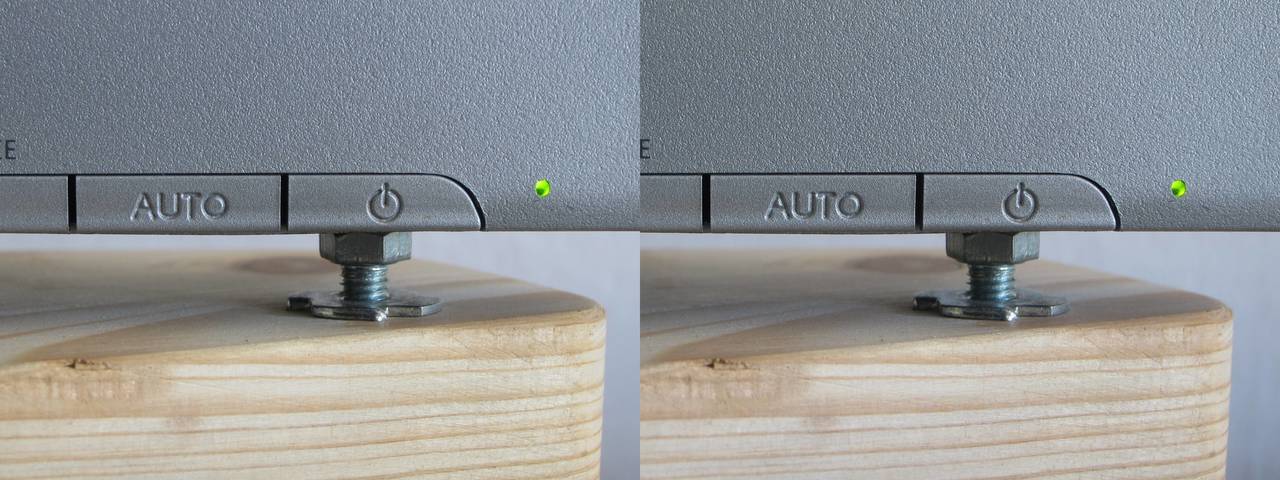
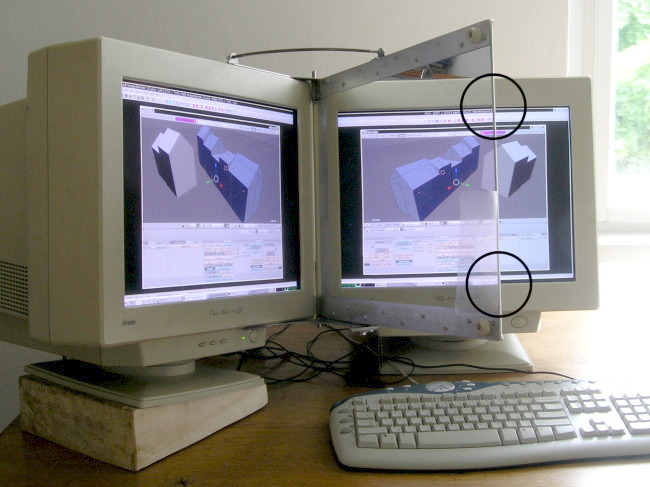
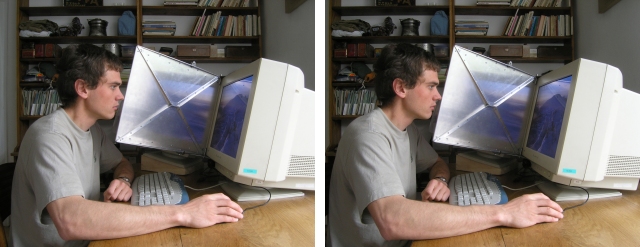
If the alignment of the monitors and the mirror is precise, the reflected image overlaps exactly with the screen behind (from any point of view)
(click for crossed view small / crossed view large)
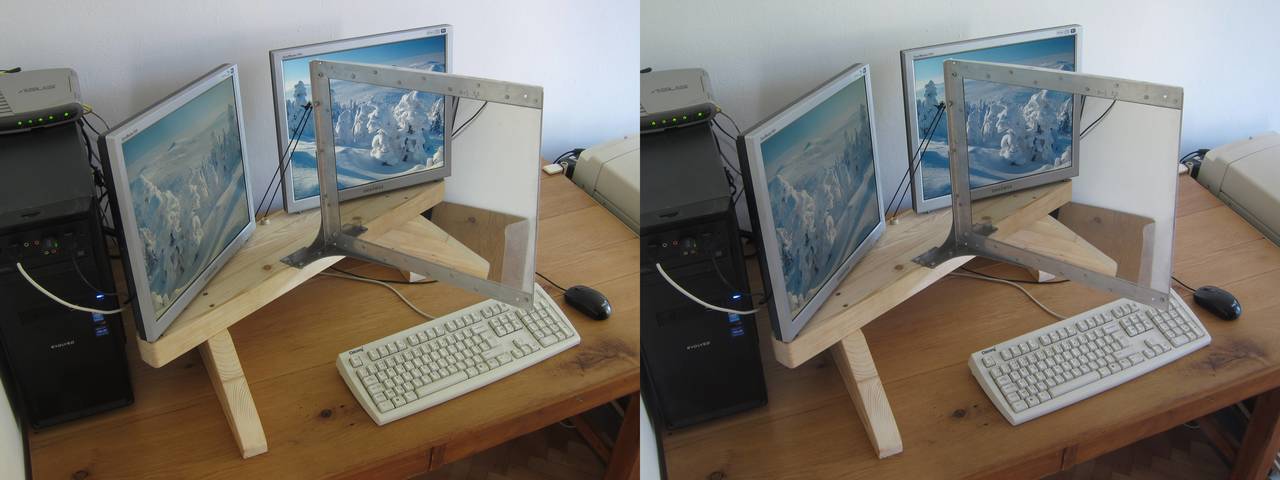
The set-up is tilted upwards, resulting in a geometrically complicated shape of the stand. Alternatively, the whole thing could have been placed horizontally higher above the table, with the centreline at eye level, but I find this arrangement both more comfortable (ergonomic) and elegant.
(click for crossed view small / crossed view large)

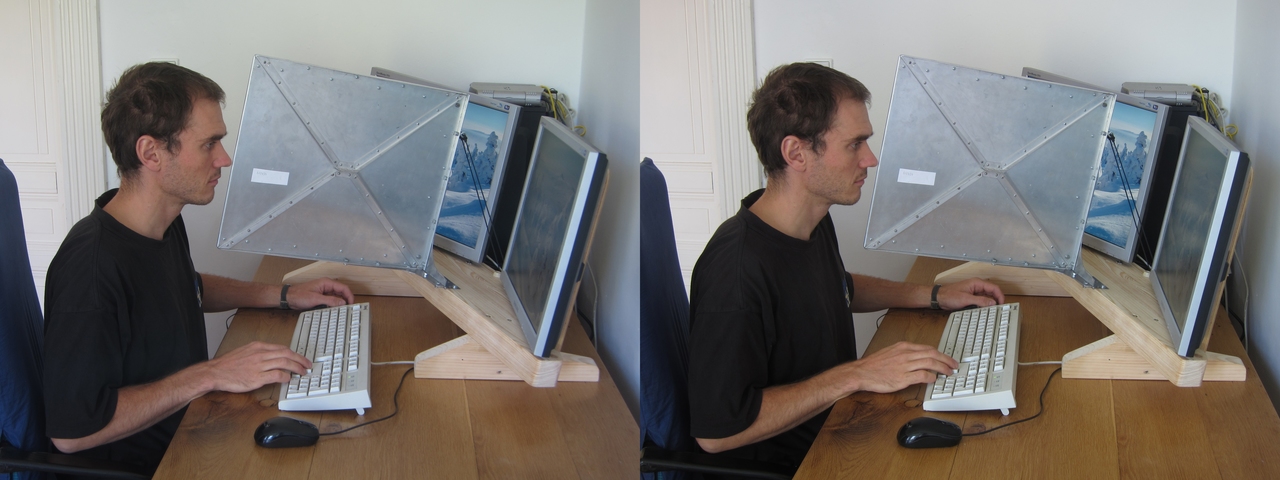
The mirror is on sturdy hinges and easily tips up out of the way to allow ordinary (mono) work on both of the screens. I used the mirror and plate from my previous set-up, with its 19th century riveted design. A smaller mirror on a lighter wooden board would have worked equally well in this case...
(Click for crossed view small / crossed view large)
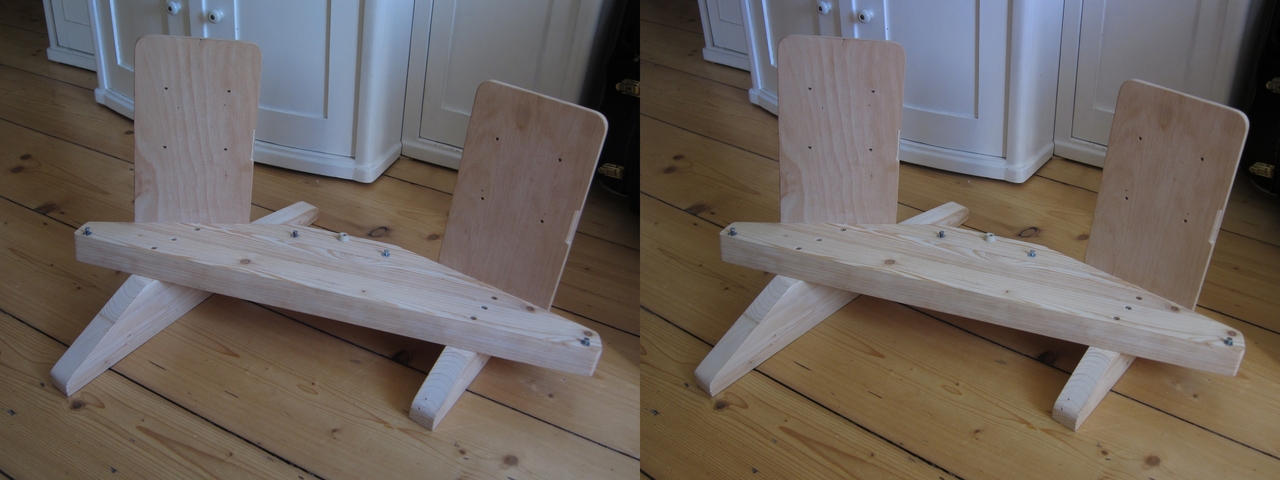
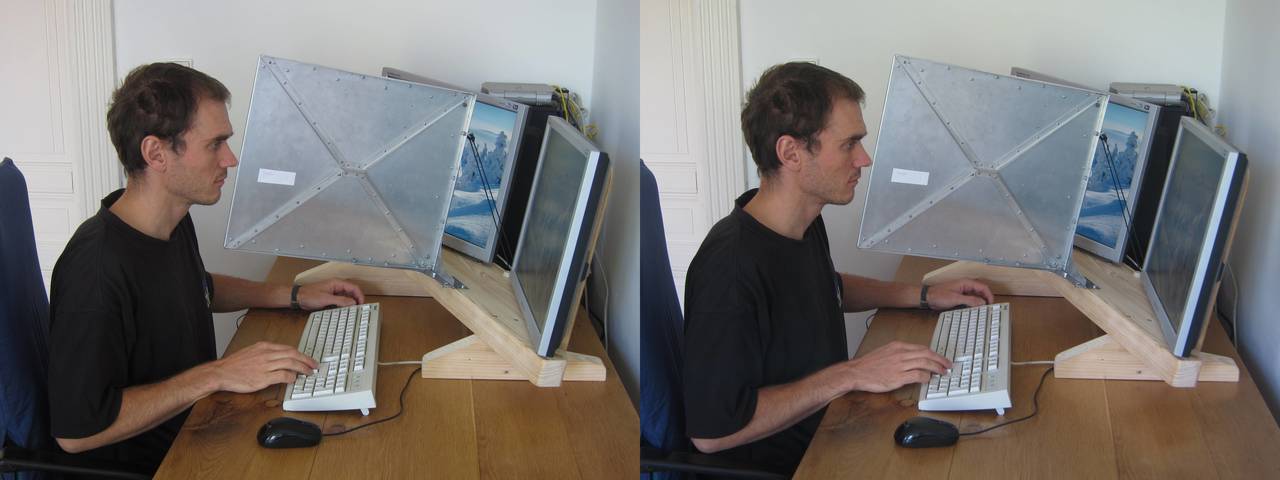
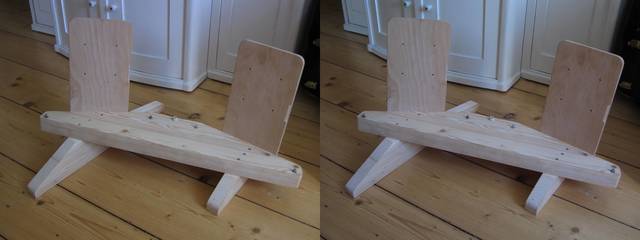
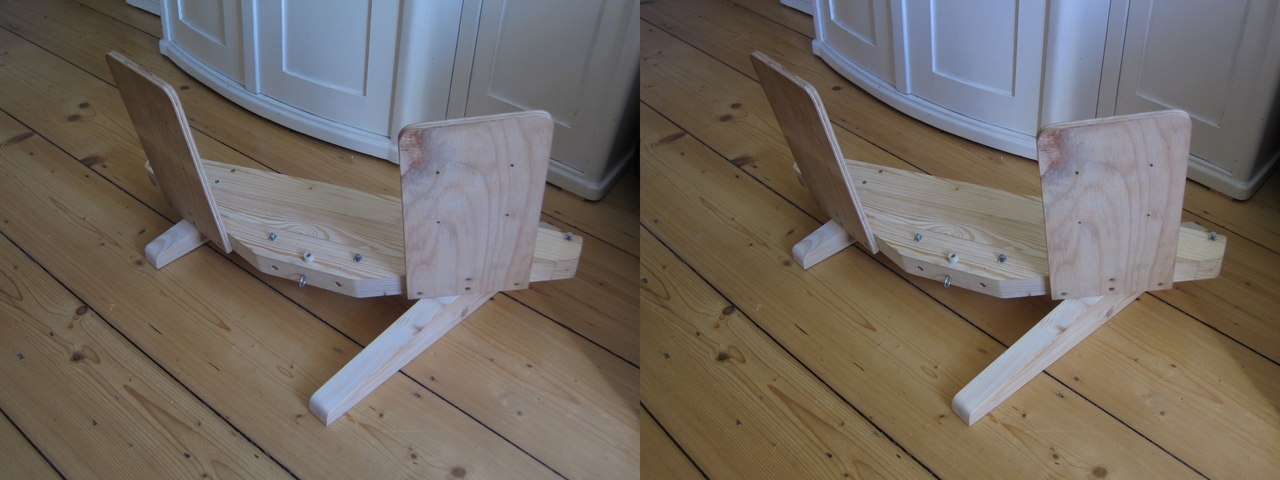
The base is a solid wooden board, supported by feet shaped to the desired angle. The vertical columns the monitors attach to are made of 15 mm plywood. To ensure precise and consistent alignment, the stand has to be very robust and geometrically correct.
(click for crossed view small / crossed view large)
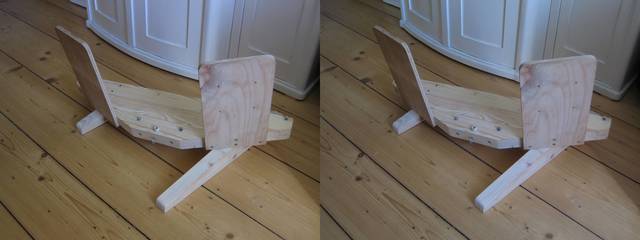
When I brought this thing home from the workshop, my wife asked why was it so crooked. Hard to believe, but this shape was intentional:-) (click for crossed view small / crossed view large)
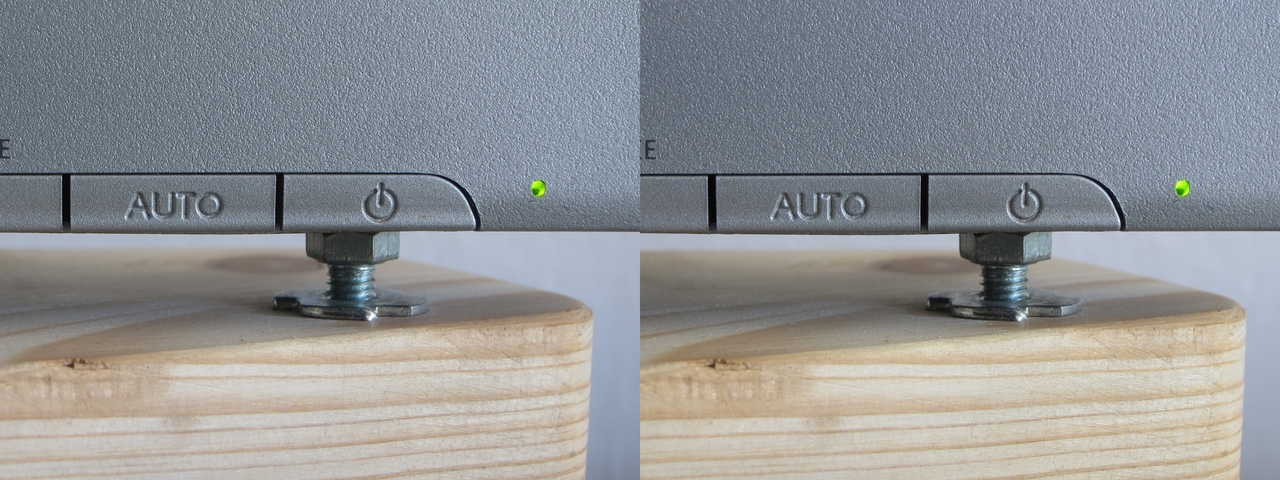
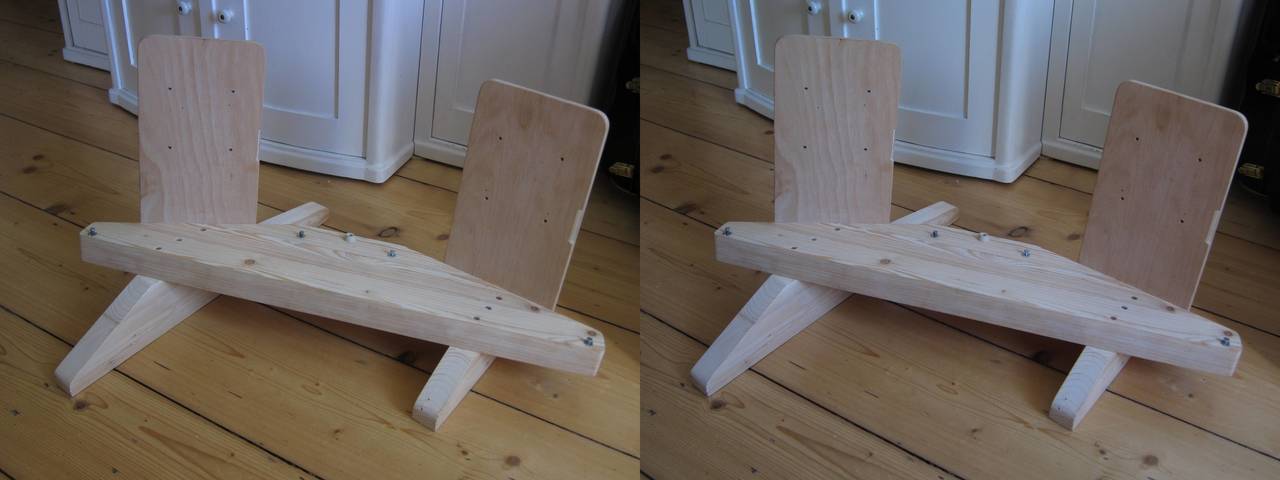
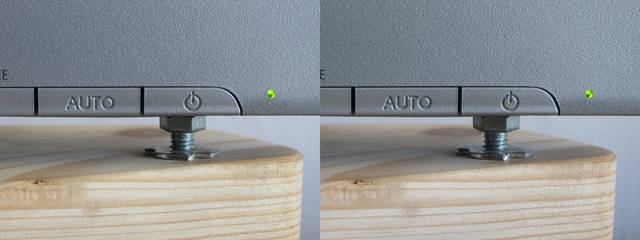
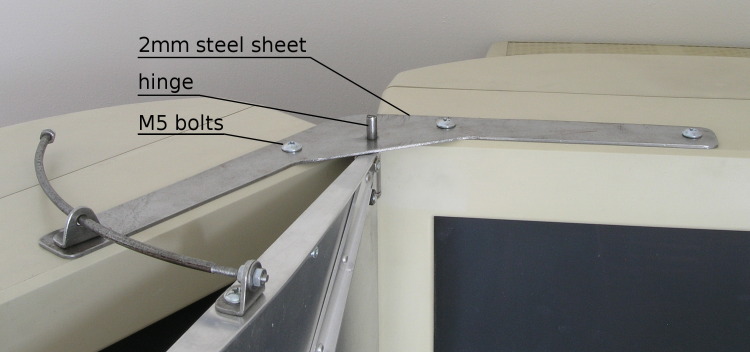
To simplify adjustments, the bottoms of the monitors are supported by M5 screws on each side (4 total). Screwing this screw out of the nut lifts the ajacent corner of the monitor. I left the screws of the VESA mount at the back of the monitors loose at first and tightened them after a precise alignment has been reached.
(click for crossed view small / crossed view large)
For the time being (written in 2010) there is no consumer digital stereoscopic viewing technology that would at least approach the experience of viewing a stereo slide in a quality back-lit viewer (my preferred technology so far). To get seriously started in digital stereoscopic imaging I have decided to build a dual monitor - single mirror set-up (mirror stereoscope). This viewing method has been popularized by the stereoscopic guru, professor John Hart of Colorado. I would like to thank John for sharing his experiences and for supporting me with my own project. See also John's web-page describing the principle.
Top view of the set-up. Parallel view - click to see the same as crossed view
The idea is simple - Both eyes seem to be looking straight at the front monitor where one image of the stereo pair is displayed, but the view of one eye (left in this case) is reflected by a mirror sideways, to the other monitor with the other half of the stereo pair - which is horizontally flipped.
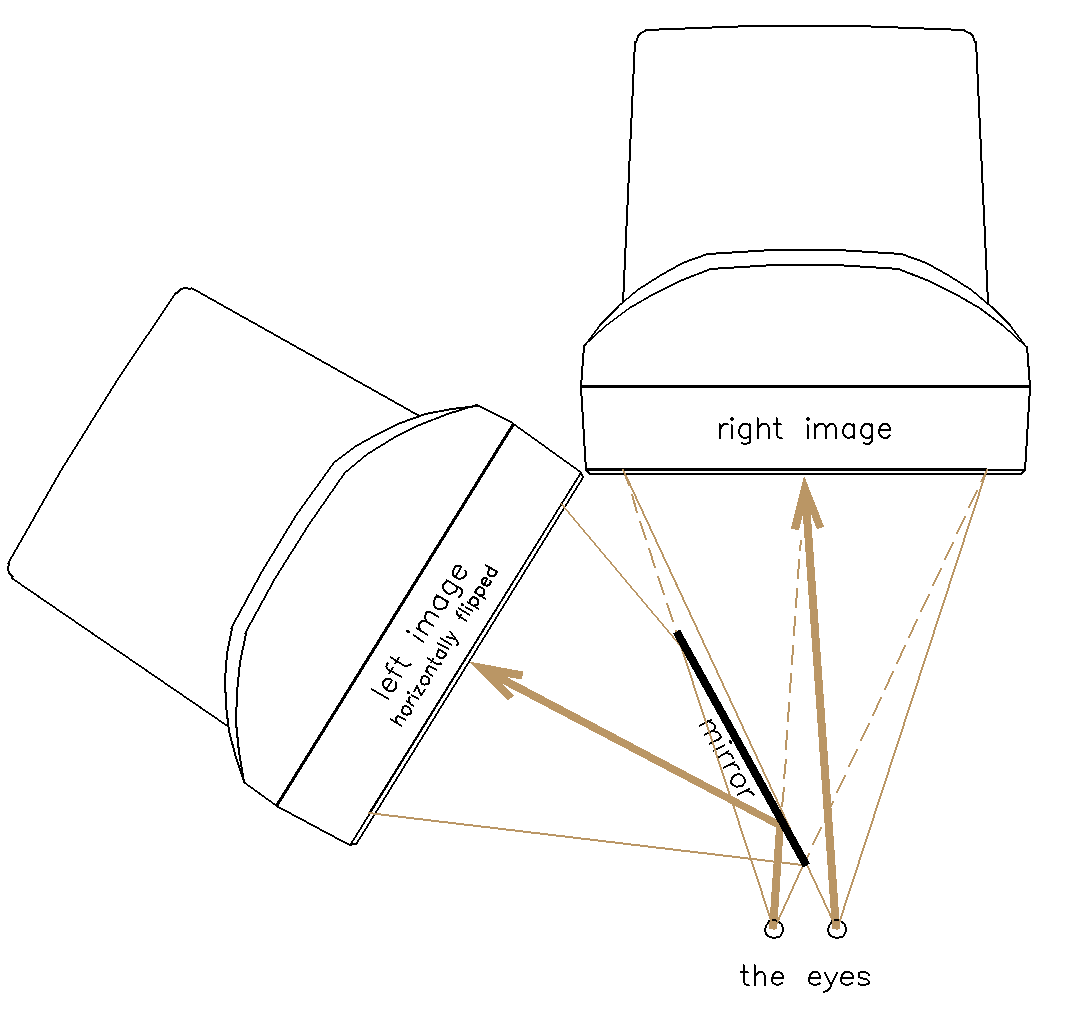
As long as the mirror is precisely on the centreline of the angle between the monitors, the geometry is correct and the image is undistorted. If properly adjusted, the image of the reflected screen exactly overlaps with the "front" screen from any point of view.
A dual head graphics card is used to connect both monitors to the same computer.
The advantages of this set-up, compared to other digital viewing methods:
- high resolution
- no ghosting
- full colour
disadvantages: very bulky, can not be carried around like the Realist Red Button slide viewer;-)
Two quality CRT monitors can be obtained quite easily nowadays as many offices are switching to LCDs. I got mine for free. The only remarkable investment is the required high quality front surface mirror (an ordinary mirror causes multiple reflections). The mirror I used (12" x 16") is larger than necessary, for my 18" (exactly 456mm diagonal) monitors, the minimal dimensions of the mirror would be about 260mm x 200mm (WxH).
my design requirements:
- permanent set-up, allowing me to switch to stereo with a single movement without any further adjustments
- ergonomic solution, allowing me to use one of the monitors for ordinary (mono) work as well as to comfortably view stereo for hours
- Otrhoscopic viewing - geometry providing a natural viewing angle, derived from the characteristics of 35mm slide viewers.
Having this in mind, I have firmly fixed the monitors together. The mirror is on a hinged plate, which may be swung between the mono- and stereo- positions. The whole set-up is tilted, allowing for a natural and ergonomic use.
All parts used are symmetrical, so the whole set-up can be easily changed to "mirror-right" arrangement.
Animation showing the two mirror positions. Parallel view - click to see the same as crossed view
Side view of the set-up, showing the sloping-down arrangement. Parallel view - click to see the same as crossed view
This may give you a basic idea how I constructed my set-up. I am sure that many things can be done more effectively with welding and other advanced techniques.
The first challenge was to find means of firmly but not permanently mounting the monitors together. I have opened the monitor cases and used M3 screws to attach small steel plates with tapped M5 threads to the metal structure of the monitors (two at the top and two at the bottom of each monitor). The screen has been wrapped in cardboard during the process to avoid damage.
Click on the images to display a larger version
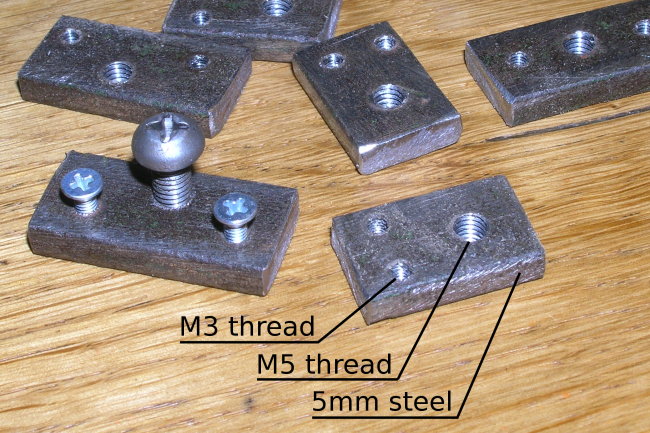
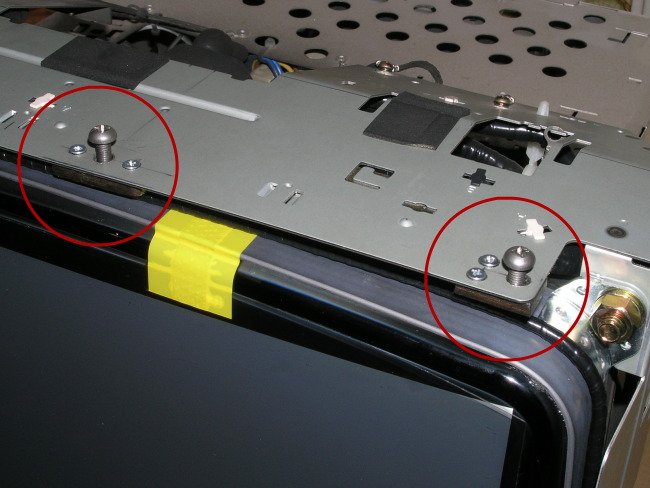
Once equipped with metric threads, the monitors can be attached together using metal plates (2mm steel sheet).
The front surface mirror I used is less than 2mm thick. Therefore I needed a perfectly planar and rigid support, yet thin and not too heavy. I have used a sheet of 2mm duralumin, strengthened by aluminium L-bars. The purpose of the crossed bars is to avoid torsion. Attached using 3mm aluminium rivets.
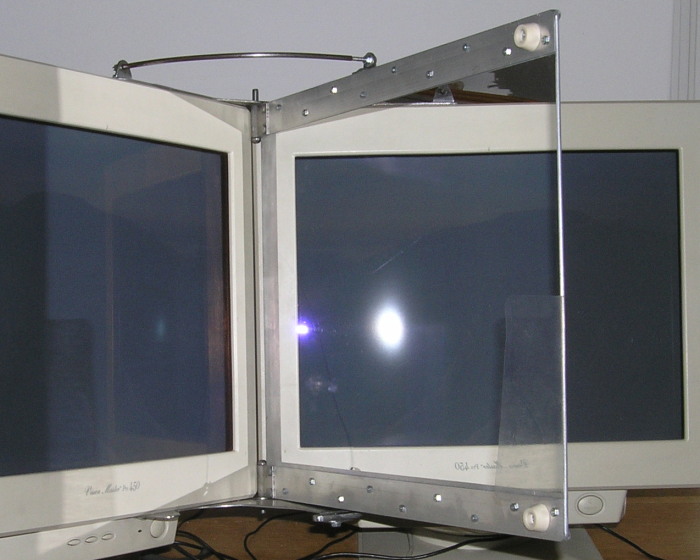
Front view
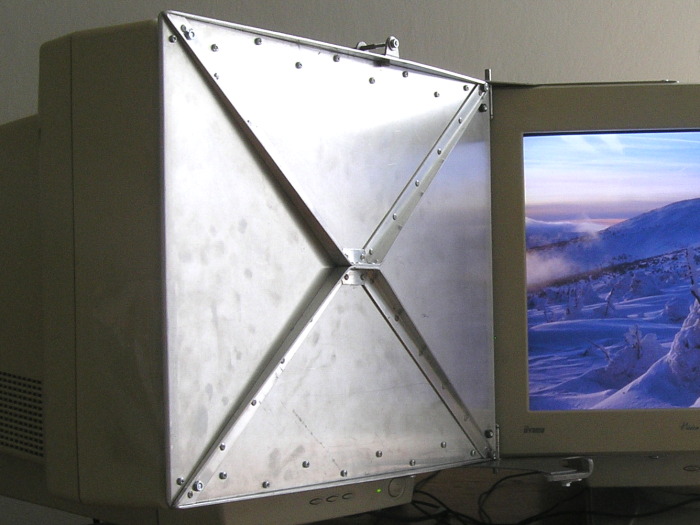
Back view
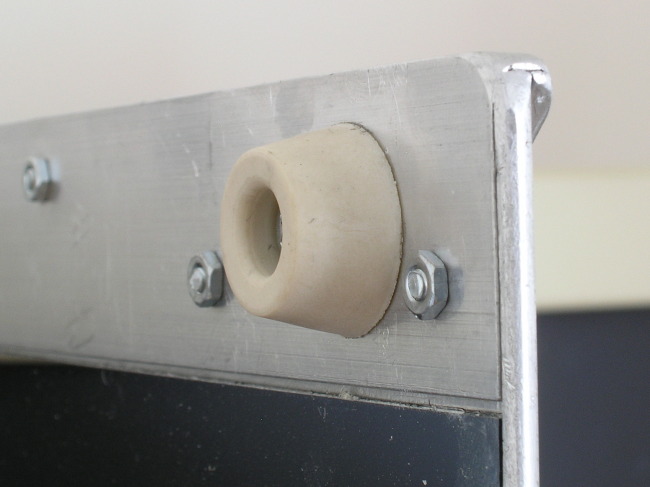
Top-front corner of the plate, showing the front vertical edge, formed by the duralumin sheet bent to 90 deg. and rounded (hiding the sharp edge of the mirror), and the strengthening aluminium L bar attached at the top.

Detail of the hinge
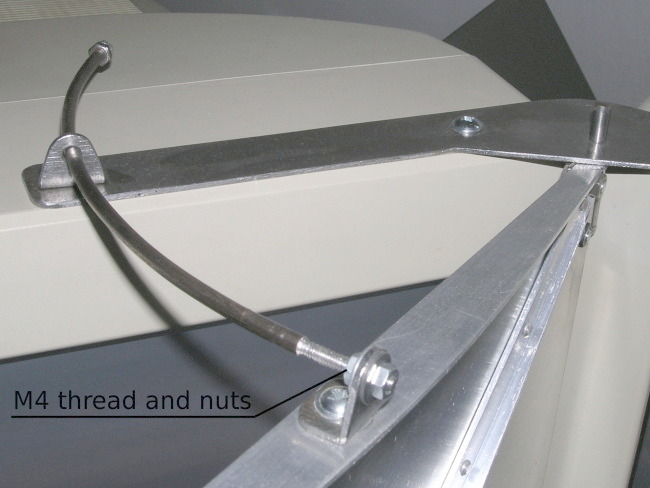
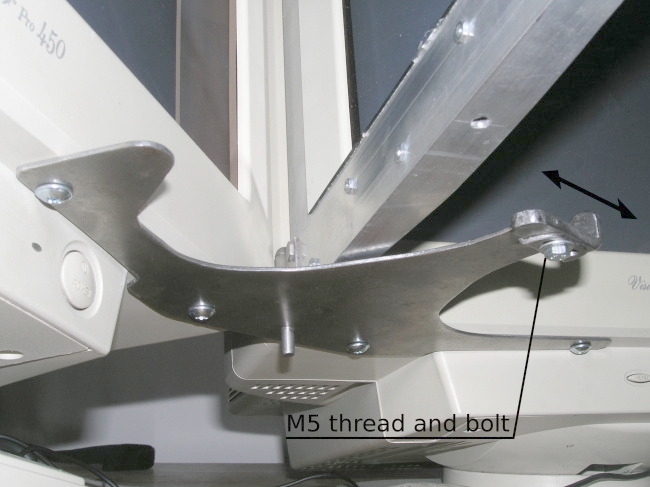
Fine adjustment of the mirror position - top (M4 nuts) and bottom (L - bracket fixed by an M5 screw)

A piece of clear plastic used to protect the mirror from breath.
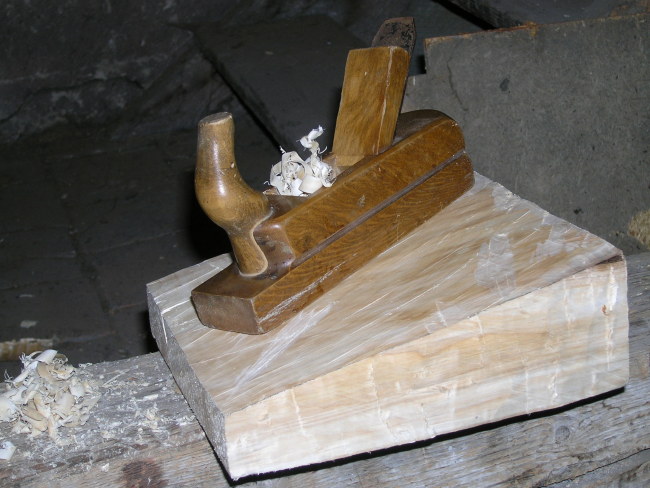
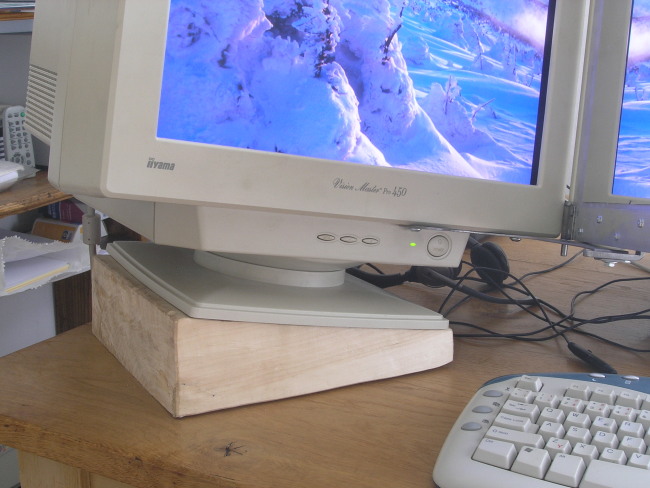
While the "front" monitor is tilted up in an ordinary manner, the "mirrored" monitor has to be tilted both up and sideways, which the original monitor stand does not permit. A wedge-shaped block of wood is used as a stand. Determining the dimensions of the block was a complicated geometrical exercise, I carefully measured the monitors and built a 3D CAD model of the whole set-up for this purpose. The following images show the process of hewing the wooden block - quite enjoyable work after all the metalworking:-)